

As a design professional, I am often called upon to help a client select tile for a renovation project or new construction. There is always a little panic in their voice, and I understand it. Tile can be intimidating. There are so many wonderful options out there, which makes it hard to get started and even harder to commit. Additionally, mistakes are costly to undo. Tile is permanent, so it is important to choose the right material and the right person for the job.
With a little knowledge, we can quell the panic and embrace the beauty of tile.
Two Main Types of Tile
There are basically two types of tile used in home interiors; natural stone or clay (manufactured) tile.
Natural stone–marble, slate, limestone, travertine, granite and sandstone–is stone quarried from the earth and each piece is unique. Natural stone is uncomplicated and beautiful. It adds warmth and texture that cannot be matched by other building materials. Stone brings an organic refinement to any design and connects us to the world beyond our door.
It is important to know that natural stone is porous. It absorbs water and can stain easily. Some stone is more porous than others, so choose carefully depending on the application. We all know natural stone back splashes are gorgeous, but a splatter of spaghetti sauce can leave its mark. Don’t worry, you can avoid this disaster with a little maintenance. Natural stone must be sealed periodically to protect its surface and ensure a long-life. Like all things found in nature, natural stone has inherent imperfections which add to its beauty. Natural stone has weak spots, pits and natural fissures that can crack or chip easily. These “defects” must be considered when handling and during installation.
Natural stone is generally more expensive than ceramic or porcelain tile.
There are two basic types of manufactured tiles: porcelain and ceramic. Both are made from clay, but porcelain is more impervious to water and harder than ceramic tile. Because it is hard, porcelain requires an experienced hand and must be cut carefully. Porcelain tile can be used outdoors and is a good choice for spaces where water is present, such as showers, baths and pools. Ceramic tile cannot be used outdoors, is easier to cut than porcelain (good for those DIY projects!) and is less expensive.
Both porcelain and ceramic tile are easy to clean and maintain. Also, each tile is consistent in color, texture and pattern. The opportunity to express your style is limitless.

Natural Stone — Limestone Floor
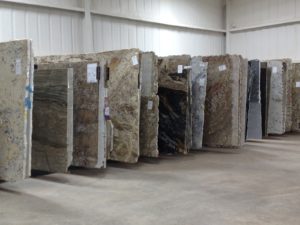
Natural Stone — Granite
Porcelain and Ceramic Tile
Why use tile? What does it contribute to a space?
I get these questions a lot, especially when working on a kitchen renovation–“Do I really need to do a backsplash? Is tile that important?”
The answer is yes.
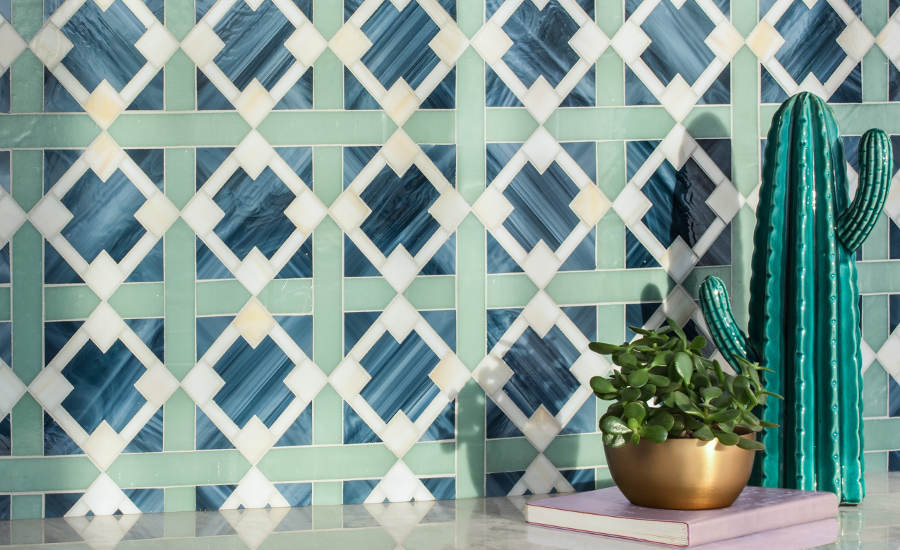
Tile adds texture and warmth to hard, flat walls. It adds importance to otherwise forgotten spaces. Tile can do wonders to break up a long run of cabinets and countertops or make a simple shower niche a showpiece. Tile allows you to show off a bit and pump some personality into a room. There are so many fabulous tile options on the market that give us endless opportunities to be glamorous, playful, subtle or dramatic. Have fun with it!
Tile also has a practical side, especially in high use spaces such as kitchens, baths, entries and mudrooms. It is durable and easy to clean. Tile protects the walls and floors from all sorts of nasty elements.
I also like using tile on the floor to break up the monotony of hardwood or carpet.


How to Use Tile
Where to start?
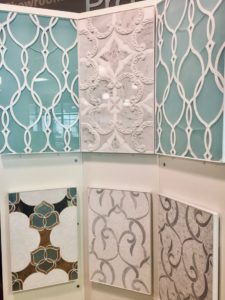
Let’s be honest, stepping into a tile showroom can be totally overwhelming. There are so many displays and so many options…it is hard to know where to start! Always remember “form follows function” and answer the question: natural stone, porcelain or ceramic? Which material is best suited to meet your specific design needs and lifestyle? What type of tile is best for your use of space?
After establishing which material is best for you, then consider the overall feel of the space and the mood you want to convey. Tile can make a bold statement or be a subtle backdrop. Decide which direction speaks to you. Do you want a glamorous bathroom that would make Marilyn Monroe jealous or a Zen retreat to recharge and rejuvenate? Also, think about the overall palette you want to achieve. Is it warm or cool? This is very important, especially when selecting several tiles for one space. Keep a consistent palette. Neutral tiles can be particularly tough. There are endless shades of white, gray and beige. Remember…cool or warm. Stay the course.
Also, don’t be afraid of switching up the direction of the tile to create interesting patterns.
When meeting a client to select tile, I find it is helpful to pre-select a few options prior to their arriving at the showroom. This eliminates the panic of so many options. I base my selections on other elements in the room, our overall color direction, the client’s style and budget. I then present options and fine tune the details with the client and showroom consultant. It is well worth the money to hire a professional to make the process of selecting tile efficient and painless.

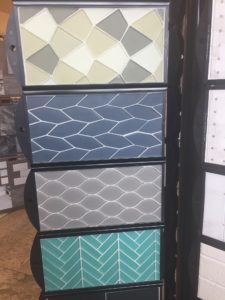
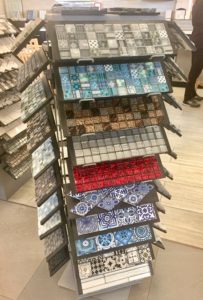
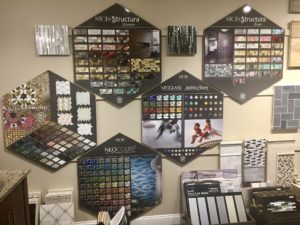
Tile Showroom


Kim’s Layouts for a Client

Janelle Parker — Mosaic Tile Alexandria


Tracy Sheffield — Conestoga Tile — Working with a Client
Material and installation
OK, so now you have selected your fabulous tile. It is time to place the order, get it installed and transform your space! There are a few key things one must know about tile installation.
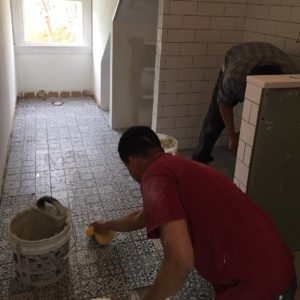
First, use an experienced tile setter. Everyone thinks they can lay tile, but trust me, they can’t. Laying tile is tricky. It is like painting a picture in 3-D. It takes someone with experience, patience and smarts to get it right.
Second, plan ahead. Have a drawing or sketch ready for your installer and discuss the layout on-site. Review precise details of your design and share specs with the installer. Talk about the angles in the room, the height of the backsplash, and where the niche will go. Nothing is insignificant. Map it out.
Once the map is drawn, the installer can determine quantities of materials so you can order the tile. Plan to add at least 10% for waste due to breakage, cutting errors or things not squaring up. Count on your installer to include underlayment and other materials in his bid.


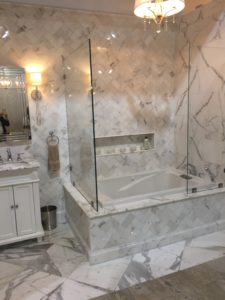
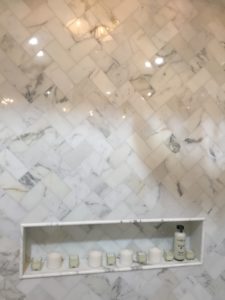
Installation at a SCL Design Project
Selecting the Grout
Now that you have selected your gorgeous tile, you need to choose the grout color and the type of grout necessary for your particular project. After many years in this business, I still find this decision stressful. There are several types of grout on the market, each with its own properties, that must pair with the type of tile you are using, where you are using it and the size of the grout lines. So many variables! Your installer or tile professional can help you with this decision, but I think it is wise to arm yourself with a little knowledge on the subject.
Types of Grout
Cement Grout
This is the most common and least expensive type of grout. It is fairly easy to work with and is available sanded or unsanded. But it does have some downsides. Cement grouts stain easily and require regular sealing. Colors can also fade over time. However, there are now high-performance cement grouts on the market that resist shrinkage and are more stain resistant. These high-performance grouts are best if you want a small grout line but should still be sealed to ensure a long clean life.
Unsanded Grout
This grout is recommended if you are using a tile that can scratch easily, such as glass or natural stone. Unsanded grout is also recommended if you are keeping your grout line to less than 1/8″.
Sanded Grout
As it sounds, this grout has sand in its composition, which helps resist cracking. The sand adds bulk and is good if using large tiles or want a larger grout line.
Epoxy Grout
Epoxy grout is the most durable grout for ceramic tile. Use it for high traffic areas such as busy mudrooms and kitchens. It comes sanded or unsanded and does not need to be sealed. Epoxy grout is more expensive than regular cement grout and sets quickly, so know where the next tile is going and work fast!
One note about grout and natural stone. Natural stone must be sealed prior to the grout process. Remember, natural stone is porous. Unlike ceramic stone, you cannot simply wipe off any grout that remains on the tile surface. Grout can be absorbed into the surface of natural stone and cause discoloration. Sealing the stone before adding grout will eliminate this issue.
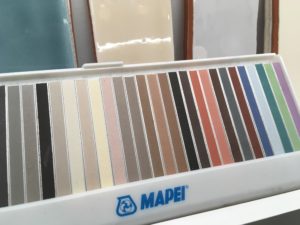
The Grout Color
There are a wide range of colors in both cement and epoxy grouts and it is often hard to choose! First, determine if you want to see the grout lines or prefer to have them blend or disappear with the tile. Seeing the grid makes a statement and is a very popular application for a vintage or deco look. I love the look of contrasting grout with subway tile in a bath or to offset an interesting small tile on a shower floor. However, for a subtler approach, I opt to match the grout to the base color in the tile. For me, I prefer this approach for floor tile. Seeing the grid pattern in a large span can be distracting and makes the area feel smaller. I prefer a more subtle, blended approach for floors.
If you do make a mistake with the grout color, don’t panic. Grout colorants can be applied after installation to change the existing grout color. This exercise is time consuming, but worth the effort if you are unhappy with the grout color you selected. Also, keep in mind that this process is most successful when applying a dark colorant to an existing light grout, rather than the other way around. It is a little tricky, so please discuss the process with a tile professional or your installer before taking on this project.
Grout Sticks


SCL Design Project — Vintage look — Contrasting Grout


Using Grout Colorant
What are the current trends in tile?
The practice of using tile for building and decorative purposes dates back as far as the 13th Century. So, eight centuries later…what’s new and exciting? Here are a few of the latest (and most fabulous!) trends in the world of tile:
Patterned “wood” tile — These porcelain tiles look like real wood flooring, but they are way more durable, color fast and easy to clean. They come in multiple colors, textures, shapes and sizes. Styles range from very formal to shabby chic.
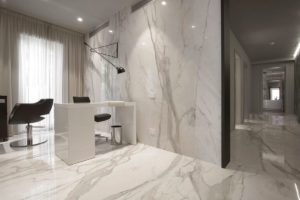
Large thin cut porcelain slabs — These porcelain slabs mimic marble or exotic stone and they are fabulous! They are incredibly realistic and can fool even the most discerning eye. The slabs come in size up to 60″ x 120″. Because the slabs are cut thin, the large size can be applied to a vertical surface. The weight is not an issue. These tiles are awesome for commercial applications or large spans of wall, such as showers and baths. They offer a very high-end look of exotic natural stone, but at fraction of the cost.
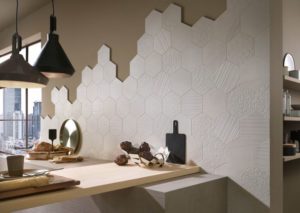
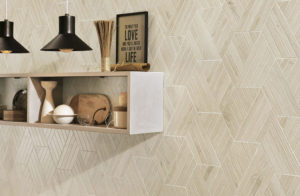
Textured 3-D tile — These tiles are often seen in a monochromatic palette with mixed patterns to create texture and movement. Tiles with a raised pattern are paired with solid, smooth tiles to create a motif that is calm and organic. 3-D metallic tiles are also popular to add dimension and a reflective quality to the otherwise quiet aesthetic.


Porcelain Tiles that Look like Real Wood Flooring


Porcelain Slabs That Mimic Natural Stone


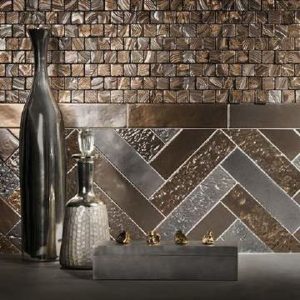
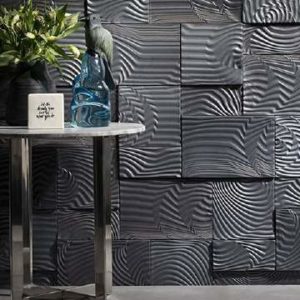
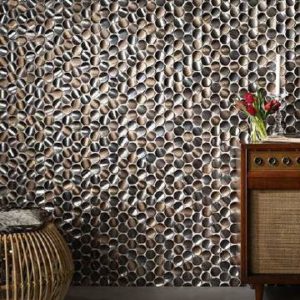
3-D Tile
Tile brings texture and warmth to almost any space, and although a bit intimidating, it is worthy of consideration for your interior projects. It is versatile and varied, which gives you the opportunity of limitless creativity. I hope this basic knowledge helps eliminate some trepidation about selecting tile and that you embrace life on the grid!